Rival Roaster Oven Instructions: A Comprehensive Guide (Updated 04/28/2026)
Updated on April 28th‚ 2026‚ this guide provides detailed instructions for your Rival Roaster Oven‚ ensuring safe and delicious cooking experiences every time.
Understanding Your Rival Roaster Oven
Welcome to the world of convenient and versatile cooking! Your Rival Roaster Oven is designed to be a secondary oven‚ perfect for holidays‚ entertaining‚ or supplementing your kitchen’s primary oven. It excels at roasting‚ baking‚ and slow cooking‚ offering a spacious interior capable of handling large cuts of meat or multiple dishes simultaneously.
This appliance operates on the principles of efficient heat circulation‚ ensuring even cooking throughout. Unlike traditional ovens‚ roaster ovens utilize a unique heating element and reflective surfaces to distribute warmth effectively. Understanding this core function is key to maximizing your cooking results. Familiarize yourself with the oven’s capacity – typically ranging from 18 to 22 quarts – to plan your meals accordingly.
Before diving into recipes‚ it’s crucial to grasp the oven’s limitations and strengths. It’s not intended to replace your standard oven entirely‚ but rather to complement it‚ offering flexibility and convenience.
Key Features and Components
Your Rival Roaster Oven boasts several key features for ease of use and optimal performance. These include adjustable temperature controls‚ typically ranging from 150°F to 450°F‚ allowing for precise cooking. A removable roasting rack is included‚ facilitating easy meat handling and drippings collection. The durable‚ porcelain-coated interior ensures even heat distribution and simplifies cleaning.
Essential components consist of the oven base‚ the roasting pan with a lid‚ and the removable rack. The lid often features a viewing window for monitoring cooking progress without releasing heat. Many models incorporate a self-regulating thermostat to maintain consistent temperatures. Look for features like a timer with automatic shut-off for added convenience and safety.
Understanding each component’s function will enhance your overall cooking experience and ensure proper operation.
Model Variations & Identifying Your Model
Rival Roaster Ovens come in various sizes and feature sets to suit different needs. Common variations include 18-quart‚ 22-quart‚ and larger capacity models‚ impacting the size of dishes you can prepare. Some models offer additional features like “bake” and “slow cook” settings‚ expanding culinary possibilities.
Identifying your specific model is crucial for accessing the correct documentation and support. Locate the model number on a sticker typically found on the oven’s base‚ back panel‚ or inside the lid. This number is essential when contacting customer service or searching for replacement parts.
Refer to your oven’s packaging or the Rival website using the model number to determine its specific features and capabilities. Knowing your model ensures optimal usage;

Setting Up Your Rival Roaster Oven
Before your first culinary adventure‚ proper setup is key! Ensure a stable‚ heat-resistant surface and familiarize yourself with all components for optimal performance.
Initial Setup & Before First Use
Unboxing and Inspection: Carefully remove your Rival Roaster Oven from its packaging. Inspect all components – the oven base‚ roasting pan‚ rack‚ and lid – for any shipping damage. Report any issues to the retailer immediately.
Cleaning Before First Use: Before cooking‚ wash the roasting pan and rack with warm‚ soapy water. Rinse thoroughly and dry completely. Wipe down the interior and exterior of the oven base with a damp cloth. Do not immerse the oven base in water!
Seasoning (Optional): Some users prefer to lightly season the roasting pan with cooking oil before first use to prevent sticking. Apply a thin coat of oil and bake at a low temperature (200°F/93°C) for 30 minutes. Allow to cool completely before using. This step isn’t mandatory‚ but can enhance performance.
Familiarize Yourself: Take a moment to read through the entire instruction manual. Understanding the oven’s features and safety precautions will ensure a safe and enjoyable cooking experience.
Proper Placement & Ventilation Requirements
Stable Surface: Place your Rival Roaster Oven on a flat‚ stable‚ and heat-resistant surface. Avoid uneven surfaces that could cause the oven to wobble or tip over during operation. A kitchen countertop or sturdy table is ideal.
Clearance is Key: Ensure at least 6 inches (15cm) of clear space around the oven on all sides – top‚ back‚ and sides. This allows for adequate ventilation and prevents overheating. Do not place the oven directly under cabinets.
Avoid Heat Sources: Keep the oven away from flammable materials such as curtains‚ paper towels‚ and aerosols. Do not operate near other heat-generating appliances.
Electrical Outlet Access: Position the oven near a grounded electrical outlet that is easily accessible. Avoid using extension cords if possible; if necessary‚ use a heavy-duty extension cord rated for the oven’s wattage.
Power Cord Safety & Grounding Instructions
Inspect Before Use: Always examine the power cord for any signs of damage – cracks‚ fraying‚ or exposed wires – before each use. Do not operate the oven if the cord is damaged. Contact customer support for a replacement.
Grounding is Essential: Your Rival Roaster Oven is equipped with a three-prong grounded plug. This plug must be inserted into a properly grounded outlet to minimize the risk of electrical shock. Never remove or alter the grounding prong.
Avoid Cord Hazards: Ensure the power cord does not come into contact with hot surfaces of the oven during operation. Keep the cord away from sharp edges and areas where it could be tripped over.
Proper Disconnection: To disconnect the oven‚ turn the controls to the “off” position and then unplug the cord from the outlet. Pulling on the cord itself can damage the wiring.
Operating Instructions: Basic Use
Begin by familiarizing yourself with the intuitive controls; adjusting temperature and timer settings is straightforward for effortless roasting‚ baking‚ and warming.
Temperature Control Settings Explained
Understanding the temperature dial is crucial for successful cooking. Your Rival Roaster Oven features a wide temperature range‚ typically from 150°F to 450°F (65°C to 232°C). Lower settings are ideal for slow cooking‚ keeping food warm‚ or delicate baking‚ while higher temperatures are best suited for roasting meats and achieving crispy textures.
The dial is usually marked with common cooking temperatures‚ but it’s always recommended to use a meat thermometer to ensure food reaches a safe internal temperature. Note that oven temperatures may vary slightly; preheating is essential for accurate results.
For poultry‚ a temperature of 325°F (163°C) is generally recommended. Beef roasts benefit from higher temperatures‚ around 350°F (177°C) for medium-rare. Cakes and pies typically require 350°F (177°C) as well. Always consult your recipe for specific temperature guidelines and adjust accordingly. Consistent monitoring ensures perfectly cooked dishes every time.
Setting the Timer & Automatic Shut-Off
The Rival Roaster Oven’s timer function offers convenience and safety. To set the timer‚ rotate the timer dial to your desired cooking time. The oven will automatically shut off when the timer reaches zero‚ preventing overcooking and reducing energy consumption. Always double-check the set time before starting the cooking process to avoid unexpected shut-offs.
The maximum timer duration varies by model‚ typically ranging from 60 minutes to 3 hours. Some models feature a “Stay On” setting‚ which disables the automatic shut-off function for continuous operation – use this cautiously. It’s crucial to remain vigilant when using the “Stay On” setting‚ monitoring the food closely.
If the timer malfunctions‚ immediately unplug the oven and refer to the troubleshooting section. Never attempt to repair the timer yourself. Proper timer usage ensures safe and efficient operation of your Rival Roaster Oven.
Preheating the Oven – Best Practices
Proper preheating is essential for consistent cooking results with your Rival Roaster Oven. Allow approximately 10-15 minutes for the oven to reach the desired temperature before placing food inside. Use the temperature control dial to select the appropriate setting‚ and monitor the indicator light – it will typically turn off when preheating is complete.
For optimal results‚ preheat the oven even when slow cooking‚ as it helps to establish a consistent temperature base. Avoid opening the oven door frequently during preheating‚ as this can prolong the process and affect temperature accuracy. A fully preheated oven ensures even cooking and browning.

Different recipes may require varying preheating times; always refer to the recipe instructions. If the recipe doesn’t specify‚ the standard 10-15 minute timeframe is generally sufficient. Consistent preheating is a key factor in achieving delicious and perfectly cooked meals.
Cooking with Your Rival Roaster Oven
Unlock culinary possibilities! This section details roasting meats‚ baking delightful treats‚ and utilizing slow cooking features for flavorful‚ tender results every time.
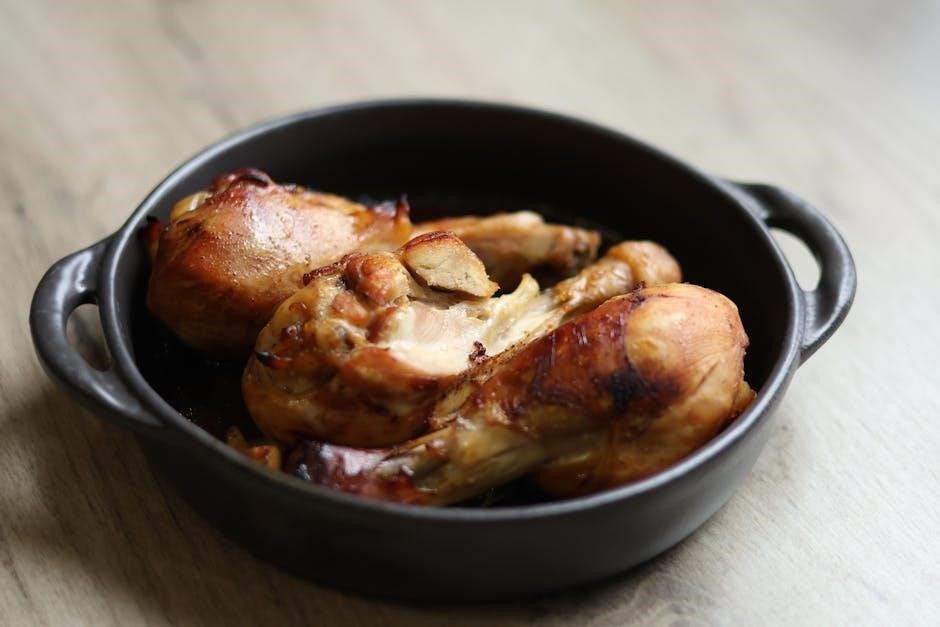
Roasting Meats: Chicken‚ Turkey‚ Beef
Achieving perfectly roasted meats within your Rival Roaster Oven is remarkably simple. For chicken‚ a temperature of 325°F (163°C) for approximately 20 minutes per pound yields juicy‚ flavorful results. Turkey benefits from similar temperatures‚ adjusting cooking time based on weight – generally 15-20 minutes per pound.
Beef roasts require careful attention to desired doneness. Sear the beef briefly on all sides before placing it in the roaster for even cooking. Utilize a meat thermometer to ensure internal temperatures reach safe levels: 145°F (63°C) for medium-rare‚ 160°F (71°C) for medium‚ and 170°F (77°C) for well-done.
Elevating the meat on a roasting rack promotes air circulation and prevents sticking. Basting periodically with pan juices keeps the meat moist and enhances flavor. Remember to let the meat rest for 10-15 minutes before carving‚ allowing juices to redistribute for maximum tenderness.
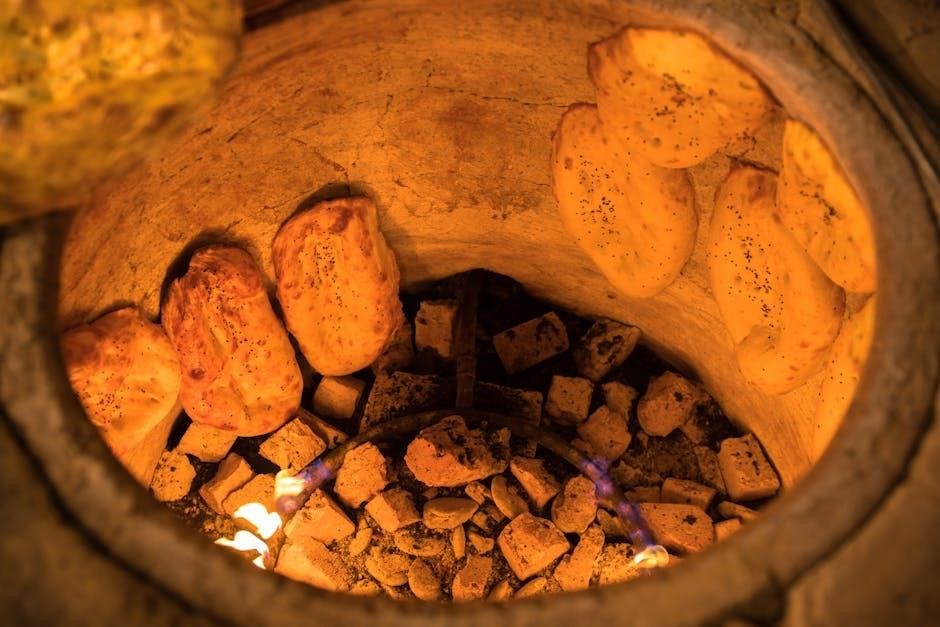
Baking: Cakes‚ Pies‚ and Bread
Your Rival Roaster Oven excels at baking a delightful array of treats! For cakes‚ a temperature of 350°F (175°C) is generally ideal. Reduce the recipe temperature by 25°F compared to a conventional oven. Pies‚ particularly fruit pies‚ bake beautifully at 375°F (190°C)‚ ensuring a flaky crust and bubbly filling.
Bread baking requires a slightly different approach. Initially‚ preheat the oven to 400°F (200°C) for crust development‚ then reduce to 350°F (175°C) to finish baking through. Using baking pans appropriate for the roaster’s size is crucial for even results.
Check for doneness using a toothpick for cakes and pies‚ and by tapping the bread’s bottom for a hollow sound. Remember to rotate the baking pan halfway through for uniform browning.
Slow Cooking & Keeping Food Warm
The Rival Roaster Oven’s low-temperature settings make it perfect for slow cooking tender‚ flavorful meals. Utilize the ‘Warm’ setting‚ typically around 170°F (77°C)‚ for extended cooking periods – ideal for pot roasts or pulled pork. Ensure meats are adequately sealed in a covered dish with sufficient liquid to prevent drying.
For keeping cooked food warm‚ the ‘Warm’ setting is also invaluable. It maintains serving temperature for hours without overcooking. Avoid leaving food on ‘Warm’ for excessively long periods (over 4 hours) to preserve quality and safety.
Remember to monitor internal food temperatures with a meat thermometer to guarantee safe consumption‚ especially during prolonged slow cooking or warming.
Cleaning and Maintenance
Regular cleaning extends your Rival Roaster Oven’s lifespan and ensures optimal performance. Consistent care prevents buildup and maintains food safety standards effectively.
Daily Cleaning Procedures
After each use‚ allow your Rival Roaster Oven to cool completely before beginning the cleaning process. This prevents burns and makes removal of food debris significantly easier. Begin by removing the roasting pan and rack; these components are typically dishwasher safe‚ offering a convenient cleaning option. However‚ hand washing with warm‚ soapy water is also effective.
For the interior of the oven‚ wipe down all surfaces with a damp cloth and mild dish soap. Avoid abrasive cleaners‚ as they can damage the non-stick coating. Pay particular attention to any spills or splatters‚ addressing them promptly to prevent them from hardening. Ensure all soap residue is thoroughly rinsed away with a clean‚ damp cloth. Finally‚ dry the interior completely with a soft towel before storing or using the oven again. This simple routine maintains hygiene and extends the oven’s life.
Deep Cleaning & Removing Stubborn Stains
For a more thorough clean‚ perform a deep cleaning monthly‚ or as needed based on usage. Begin by removing all removable parts – the roasting pan‚ rack‚ and any other accessories. These can be soaked in hot‚ soapy water to loosen baked-on food. For stubborn stains inside the oven‚ create a paste of baking soda and water. Apply this paste to the affected areas and let it sit for at least 30 minutes.
Gently scrub the paste with a non-abrasive sponge or cloth. Avoid harsh scouring pads‚ which can scratch the interior. Rinse thoroughly with clean water‚ ensuring all baking soda residue is removed. For particularly difficult stains‚ a specialized oven cleaner safe for your oven’s coating may be used‚ following the manufacturer’s instructions carefully. Always dry all components completely before reassembling and storing.
Storage Instructions & Long-Term Care
Proper storage extends the life of your Rival Roaster Oven. Before long-term storage‚ ensure the oven is completely clean and dry to prevent mold or odors. Remove the roasting pan‚ rack‚ and any accessories and store them separately within the oven cavity‚ or in a safe place. Avoid stacking heavy items on top of the oven during storage‚ as this could cause damage.
Store the oven in a cool‚ dry location‚ away from direct sunlight and extreme temperatures. If possible‚ cover the oven with a dust cover or place it in its original packaging. Periodically check the oven during storage to ensure no moisture has accumulated. Following these simple steps will help maintain your Rival Roaster Oven in optimal condition for years to come.
Troubleshooting Common Issues
This section addresses frequent problems with your Rival Roaster Oven‚ offering solutions for heating‚ timer‚ and temperature inconsistencies for optimal performance.
Oven Not Heating – Possible Causes & Solutions
If your Rival Roaster Oven isn’t heating‚ several factors could be at play. First‚ verify the power cord is securely plugged into a functioning outlet. Test the outlet with another appliance to confirm it’s receiving power. Next‚ check the temperature control knob; ensure it’s set to a temperature above ‘Warm’ or ‘Off’.
A tripped circuit breaker or blown fuse is another common culprit. Locate your electrical panel and reset any tripped breakers or replace blown fuses. Inspect the heating element for any visible damage‚ such as breaks or burns – do not attempt repairs yourself if damage is found.
If the timer is set incorrectly‚ it might be preventing the oven from heating. Reset the timer to ensure it’s not in an ‘Off’ or ‘Delay Start’ mode. For persistent issues‚ consult a qualified appliance repair technician for professional diagnosis and repair. Always disconnect the oven from the power source before any inspection.
Timer Malfunctions & Resetting Procedures
Experiencing timer issues with your Rival Roaster Oven? A common problem is the timer not starting or stopping as expected. First‚ ensure the timer knob is fully engaged after setting the desired cooking time. Sometimes‚ a slight adjustment is needed for proper contact. If the timer seems stuck‚ avoid forcing it – this could cause further damage.
To reset the timer‚ unplug the oven from the power outlet. This will completely discharge the timer mechanism. Wait approximately 60 seconds before plugging it back in. Set the timer to a short duration (e.g.‚ 5 minutes) to test if it’s functioning correctly.
If the malfunction persists‚ try gently tapping around the timer housing – this might dislodge any internal obstructions. For complex issues‚ or if the timer is completely unresponsive‚ professional repair is recommended. Never disassemble the timer yourself.
Uneven Cooking & Temperature Fluctuations
Noticing inconsistent results with your Rival Roaster Oven? Uneven cooking and temperature fluctuations can stem from several factors. Ensure the oven is placed on a level surface; an uneven base disrupts heat circulation. Avoid overcrowding the oven – allow sufficient space around food for air to flow freely;
Rotating the food halfway through cooking is crucial‚ especially for larger items like turkeys or roasts. Check the heating elements for any visible damage or obstructions. A malfunctioning element can cause localized hot spots. Verify the oven door seals properly; a poor seal allows heat to escape‚ impacting temperature stability.
Preheating thoroughly is also vital. If fluctuations continue‚ consider using an oven thermometer to verify the internal temperature against the dial setting. Consistent monitoring will help you adjust cooking times accordingly.
Safety Precautions & Warnings
Always prioritize safety! This Rival Roaster Oven gets hot; use oven mitts‚ never touch heated surfaces‚ and supervise children closely during operation.
Electrical Safety Guidelines
Crucially‚ always ensure your Rival Roaster Oven is plugged into a grounded electrical outlet of the correct voltage. Never operate the oven with a damaged cord or plug; immediately discontinue use and contact qualified service personnel for repair or replacement.
Avoid using extension cords whenever possible. If an extension cord is absolutely necessary‚ select one rated for the oven’s wattage and ensure it’s properly grounded. Do not immerse the oven‚ cord‚ or plug in water or other liquids to prevent electrical shock.
Unplug the oven from the outlet when not in use and before cleaning. Never pull the cord to disconnect the oven; grasp the plug instead. Regularly inspect the power cord for any signs of damage‚ such as fraying or cracking. Improper electrical connection can pose a serious hazard.
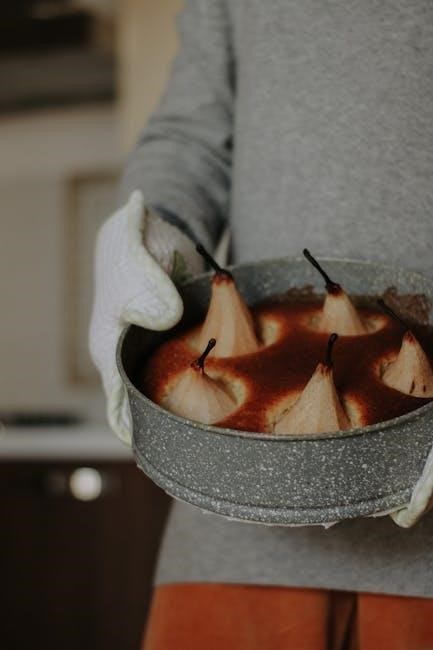
Handling Hot Surfaces & Preventing Burns
Exercise extreme caution when operating your Rival Roaster Oven‚ as exterior surfaces become intensely hot during use. Always utilize oven mitts or heat-resistant gloves when handling the roasting pan‚ lid‚ or the oven itself. Avoid touching any metal parts while the oven is on or immediately after use.
Keep flammable materials‚ such as curtains and paper towels‚ away from the oven during operation. Never allow children to touch the hot surfaces or operate the oven unsupervised. Be mindful of the hot steam released when opening the lid‚ directing it away from your face and hands.
Allow the oven to cool completely before cleaning or storing. If burns occur‚ immediately cool the affected area with cool water and seek medical attention if necessary. Prioritize safety to prevent accidental injuries.
Supervision Requirements & Child Safety
Never leave the Rival Roaster Oven unattended while in operation. Constant supervision is crucial‚ especially when children are present. This appliance is not intended for use by children without direct‚ adult supervision due to the risk of burns and electrical shock. Ensure children understand the dangers associated with a hot oven.
Keep the oven out of reach of young children. Teach older children about the hot surfaces and the importance of using oven mitts. Establish a clear safety zone around the oven during use. Regularly remind family members about oven safety protocols.
Inspect the power cord regularly for damage and immediately discontinue use if any damage is detected. Prioritize a safe cooking environment for all family members‚ particularly children.